
Your Basket is Empty
How To Calculate What Materials You Require to Install Featheredge Fencing
To install Featheredge Fencing, there are 3 generic distances between posts, 1.8M, 2.7M and 3.0M.
100mm Featheredge boards are the most common size used, and you should expect to use 23 boards for a 1.8M panel. 35 boards for a 2.7M panel and 39 for a 3.0M panel. You should also think about adding a few extra just in case.
Once you have decided on your preferred panel width, you will need to calculate the number of fence posts required depending on the length of the fence run.
Remember to allow 600mm (2 feet) for the post to go into the ground in determining your overall post length. For example, if your fence is to be 1.8M high (6 feet) out of the ground, then your post length would be 2.4M (8 feet) in total.
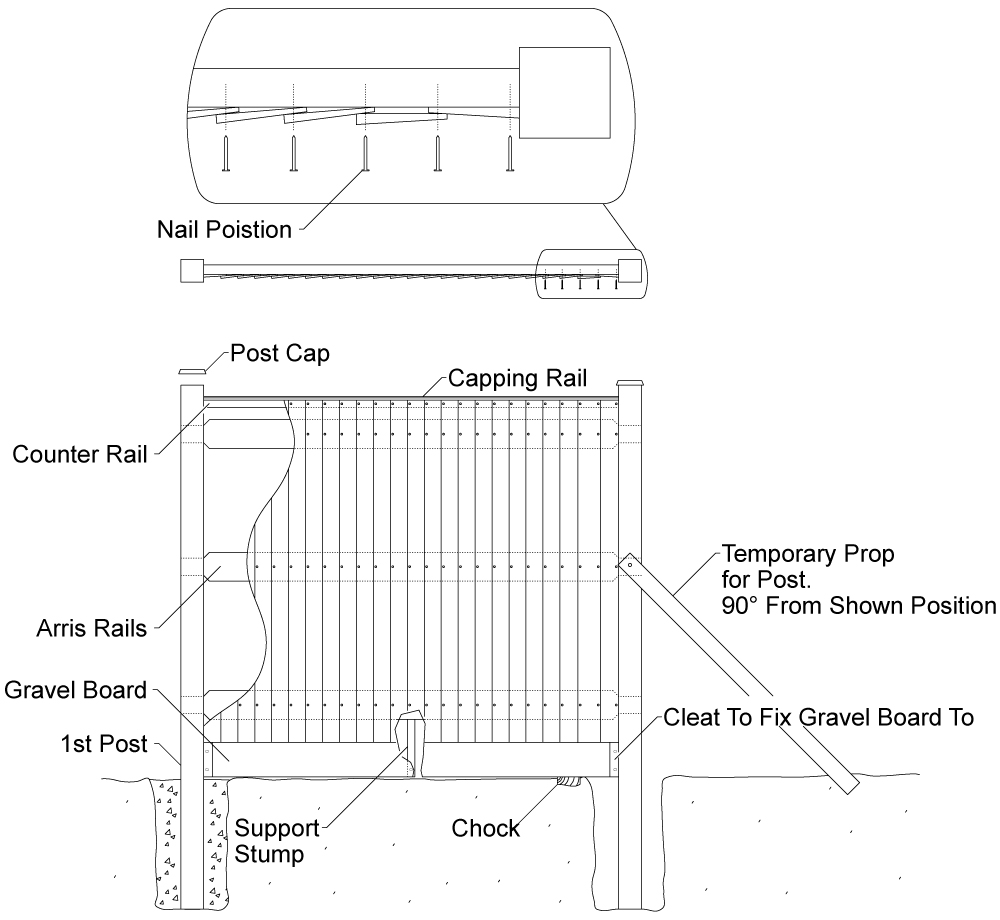
You will also need to decide whether you require Gravel Boards, Post Caps (with or without Finials), Counter Rails and Capping Rails, depending on the level of ‘finish’ required.
Materials Required
Fence Post – Morticed!, Arris Rails – Ended, Featheredge Boards, Support Stump, 40-50mm Nails & Post Mix.
Optional Materials
Counter Rail, Capping Rail, Gravel Boards (optional), Post Caps (optional), & Cleats (Fixing Gravel Board)
Tools Required
Rubber Mallet, Hammer, Spade, Spirit Level, Tape Measure, String, Watering Can or Hose Pipe, Battens and Chocks.
Preparation of the fence run.
Remove any obstructions, old fence posts, including concrete, etc. Check every 1.8M/2.7M/3.0M plus post width for any issues along the run, which would prevent you from digging a hole for the posts. If you prepare it right, then you will not have an interrupted installation, otherwise, you will have to stop and start all the time, increasing the duration of the work.
Mark out on each post where the ground level should be to ensure a consistent professional finish.
First mark where the top of the Fence should be (a couple of inches from the top), and then where the Top of the Gravel Board should be, as well as the Bottom of the Gravel Board.
The Bottom mark of the Gravel Board position is your ground level on each post. Pack under the post with hardcore if you go past your level.